
Spring DIY Project: Make This Bright Mimosa Door Wreath

Make this bright spring wreath for your front door with this simple wreath tutorial! Using vivid yellow mimosa flowers and natural foliage, this door wreath is guaranteed to brighten up the entrance to your home.

Fresh mimosa flowers are widely available from March onward. However, it is a flower that is known to dry out quite quickly, so for this wreath, I have mixed up both real and faux mimosa stems to keep it looking fresh and fluffy for longer!

For this wreath, you will need:
1 ready-made moss wreath base
Twine
1 roll of floristry wire
Scissors & secateurs
3-5 stems of faux mimosa
2 bunches of real mimosa
Optional: any other decorative flowers of your choice
1 bunch of real Pistache foliage
1 extra bunch of green foliage of your choice (conifer, eucalyptus or ruscus all work well).
Optional: Decorative eggs - these can be faux or blown eggs (the eggs featured here are blown quail eggs varnished with Modge Podge). Attach the eggs with hot glue.

Step 1: Preparation
Firstly, you’ll need to make sure that your wreath base is adequately damp to keep your real stems fresh. Either spray it generously with water or soak it in the sink and sponge off the excess.

Faux stems often come on large stalks. Trim down your faux mimosa stems with some wire cutters if necessary.
Take your real foliage and mimosa, cut down the stems and remove any excess leaves at the base.
Cut a piece of twine around 40 cm long. Tie this in a knot around your wreath base. This is how you will hang your wreath on your door and marks the 'top' of the wreath for you to work from.
Take a roll of floristry wire and attach it securely to the wreath base, ready to bind your first layer of foliage.
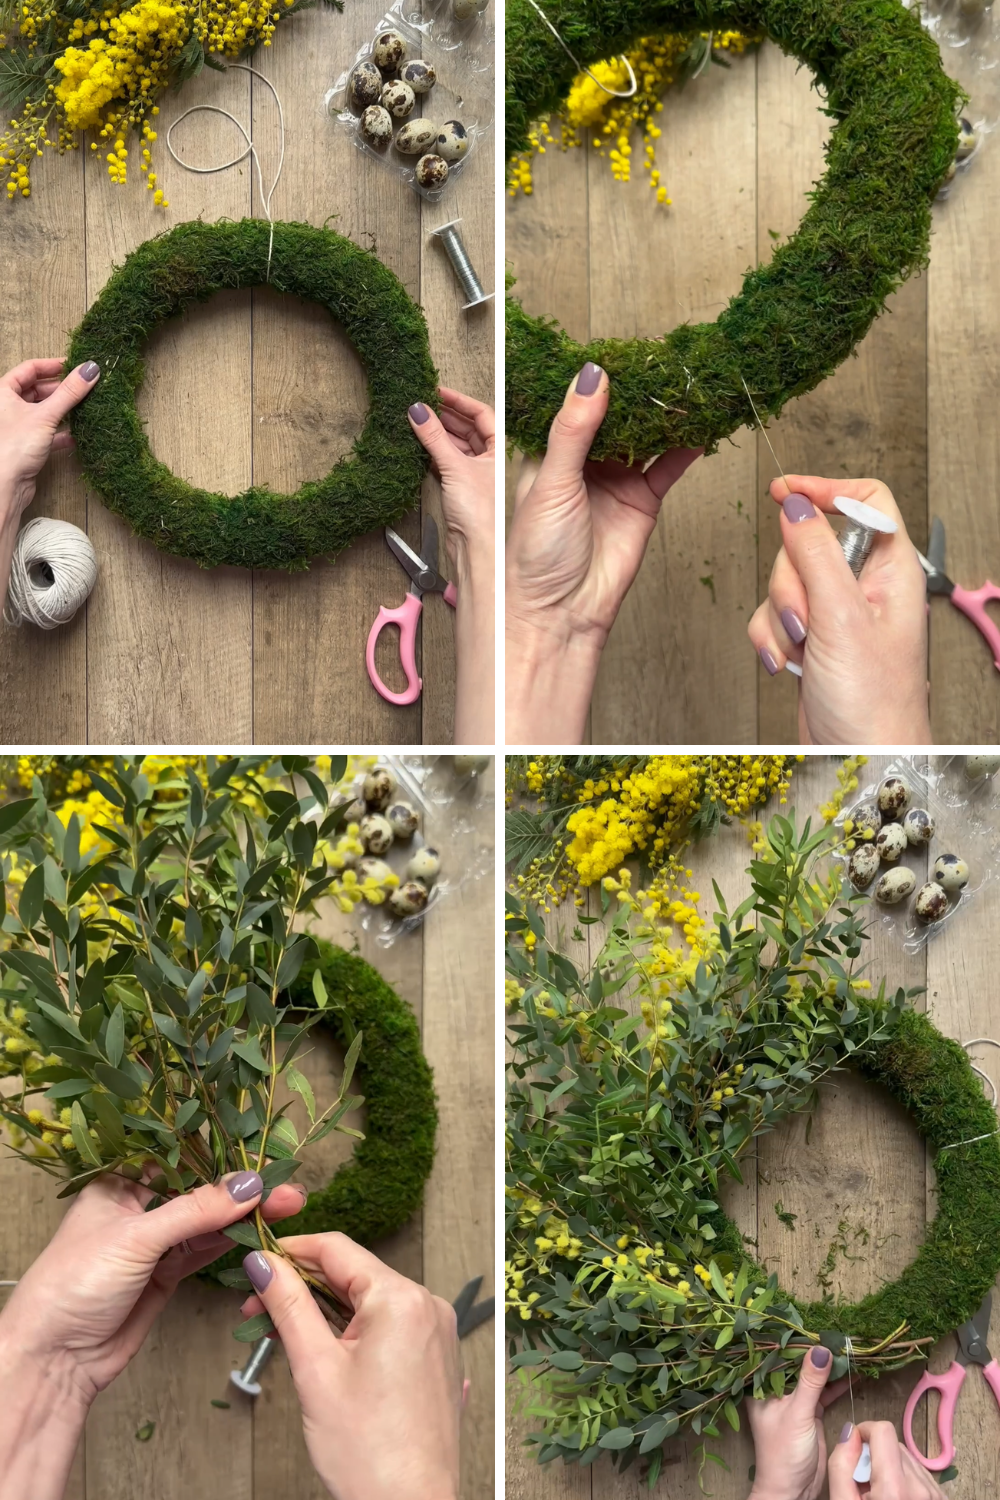
Step 2: Grouping and attaching your foliage
You’ll first need to cover all of the moss base with foliage so that it cannot be seen. Group five or six stems of your real green foliage and one stem of your faux mimosa, binding it to the base by wrapping the wire in a circular motion through the wreath. Continue in a clockwise motion, making sure that the base of the stems are nicely pushed into the damp moss.
Once your moss base is covered, pull the wire taut, cut the wire and secure it so that it does not come loose.
Step 3: Fill out your wreath
Take your real mimosa stems to tuck into the already secured wire around the front of the wreath. Distribute them evenly and cut the stems at an angle so that they can absorb as much moisture from the moss as possible.

You can now add any further flowers and decide if you want to add any decorative eggs! Once complete, give your wreath a spritz of water and hang it on your door using the twine.
Your real mimosa will start to dry into smaller balls after a few days. To keep your mimosa as fresh as possible for longer, spritz the wreath every day (or as required).


